
Harvester VM with Bridged Network
In the first article of this blog, I focused on installing Harvester and creating my first VM. In this article, I will describe how to create a VM that I can connect to directly through SSH. Indeed, the default networking mode used by Harvester is the masquerade mode, where the VMs get a cluster IP address, but cannot be accessed directly from outside the Harvester Cluster. In order to access the VMs from outside the cluster, you would need to create a NodePort service or a LoadBalancer service on the Kubernetes cluster underlying Harvester.
Setting up the network interface for the bridged network
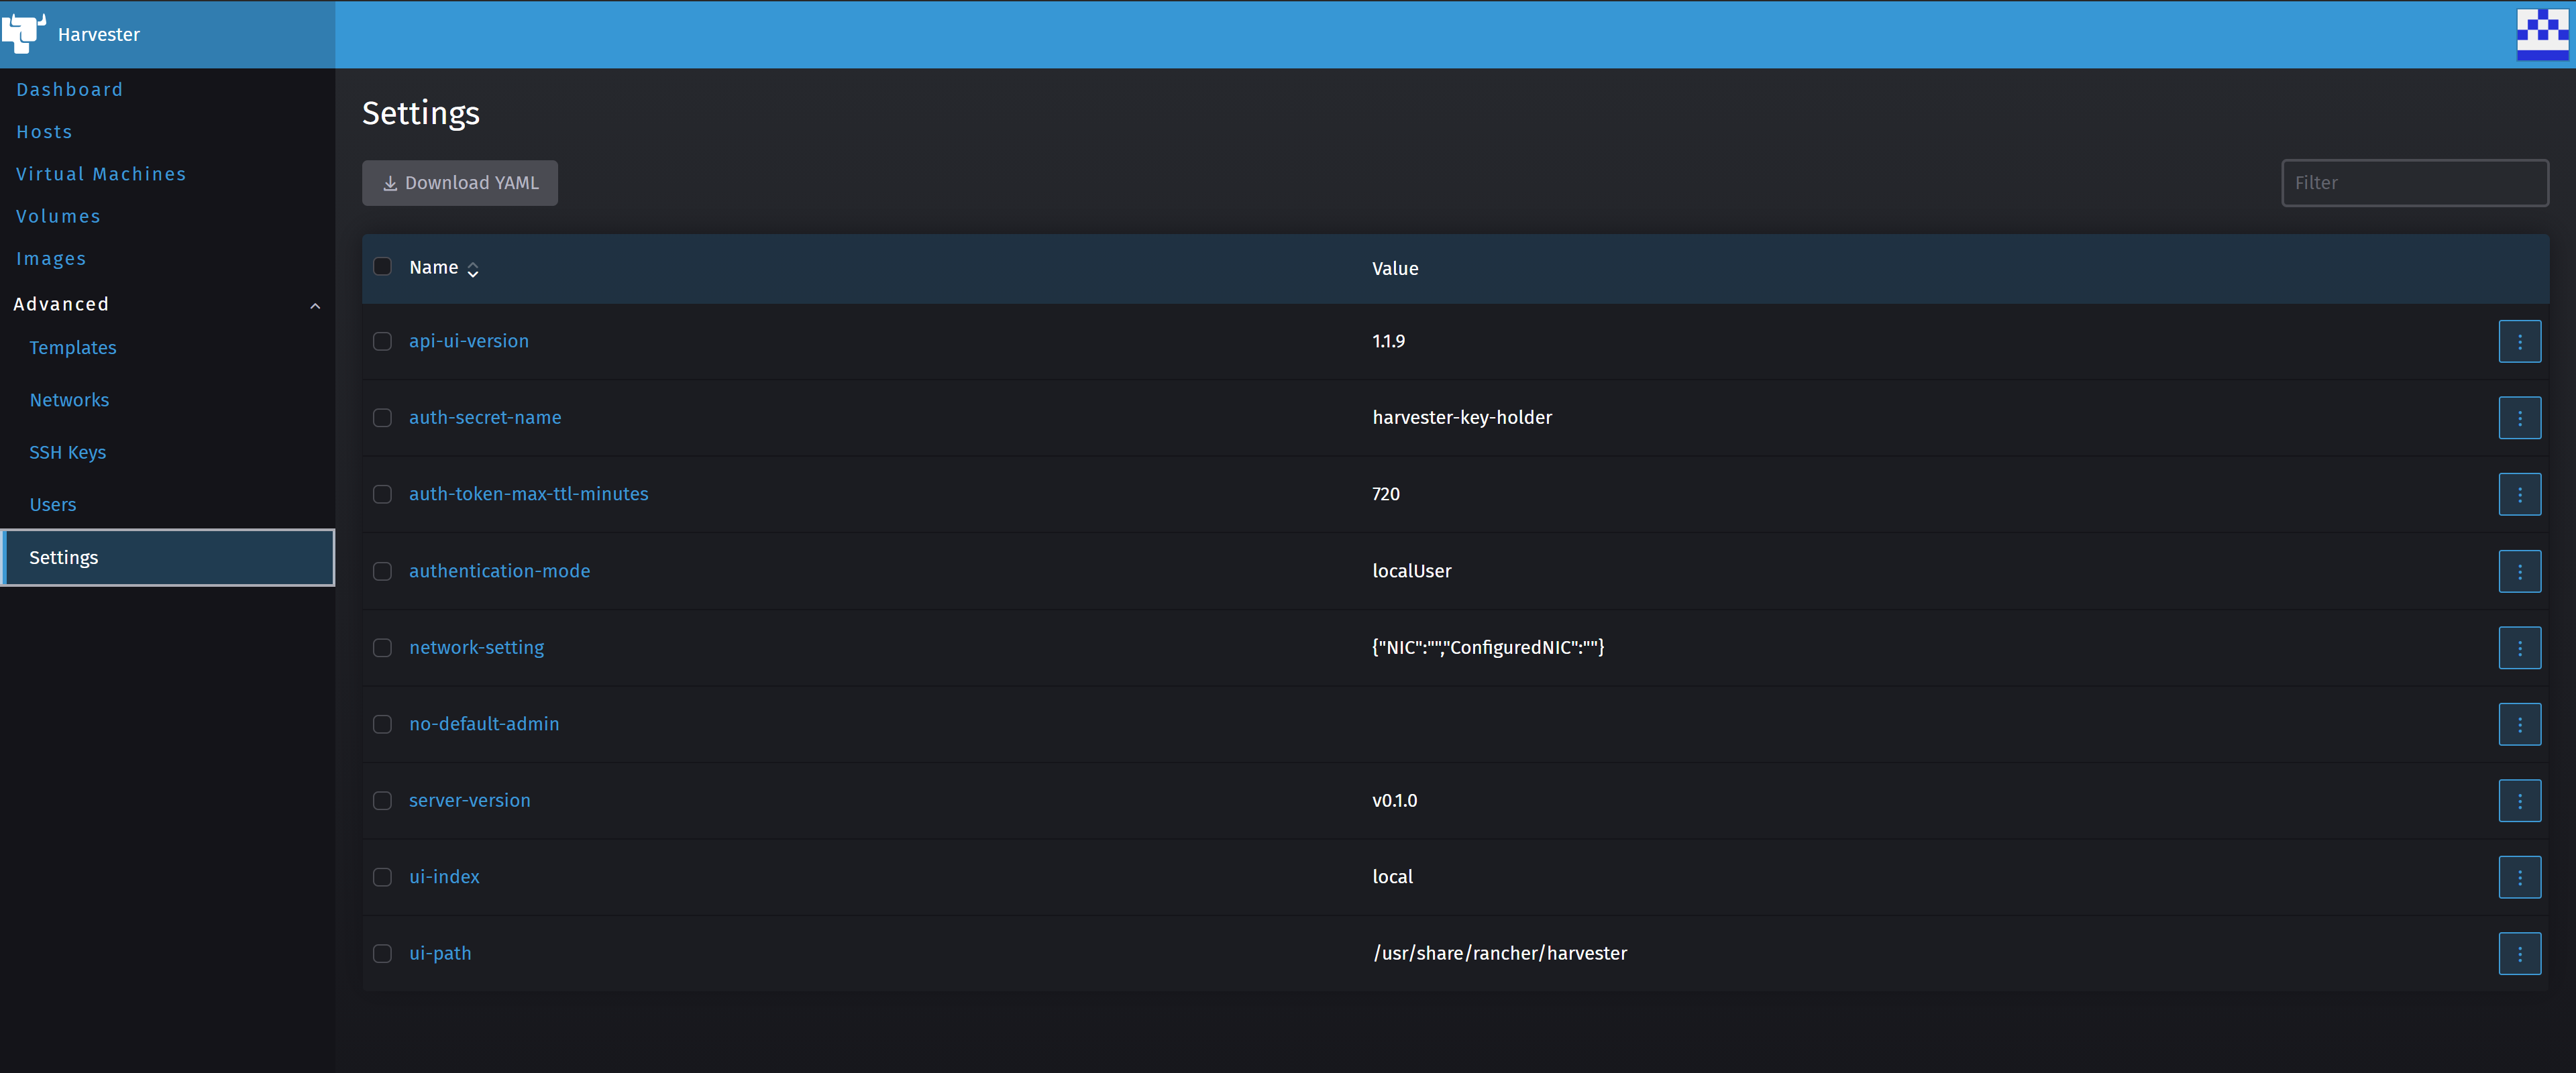
I need first to set up the Host’s interface on which bridged networking should happen. I can do that by going to the advanced/settings where I will find the network-setting:
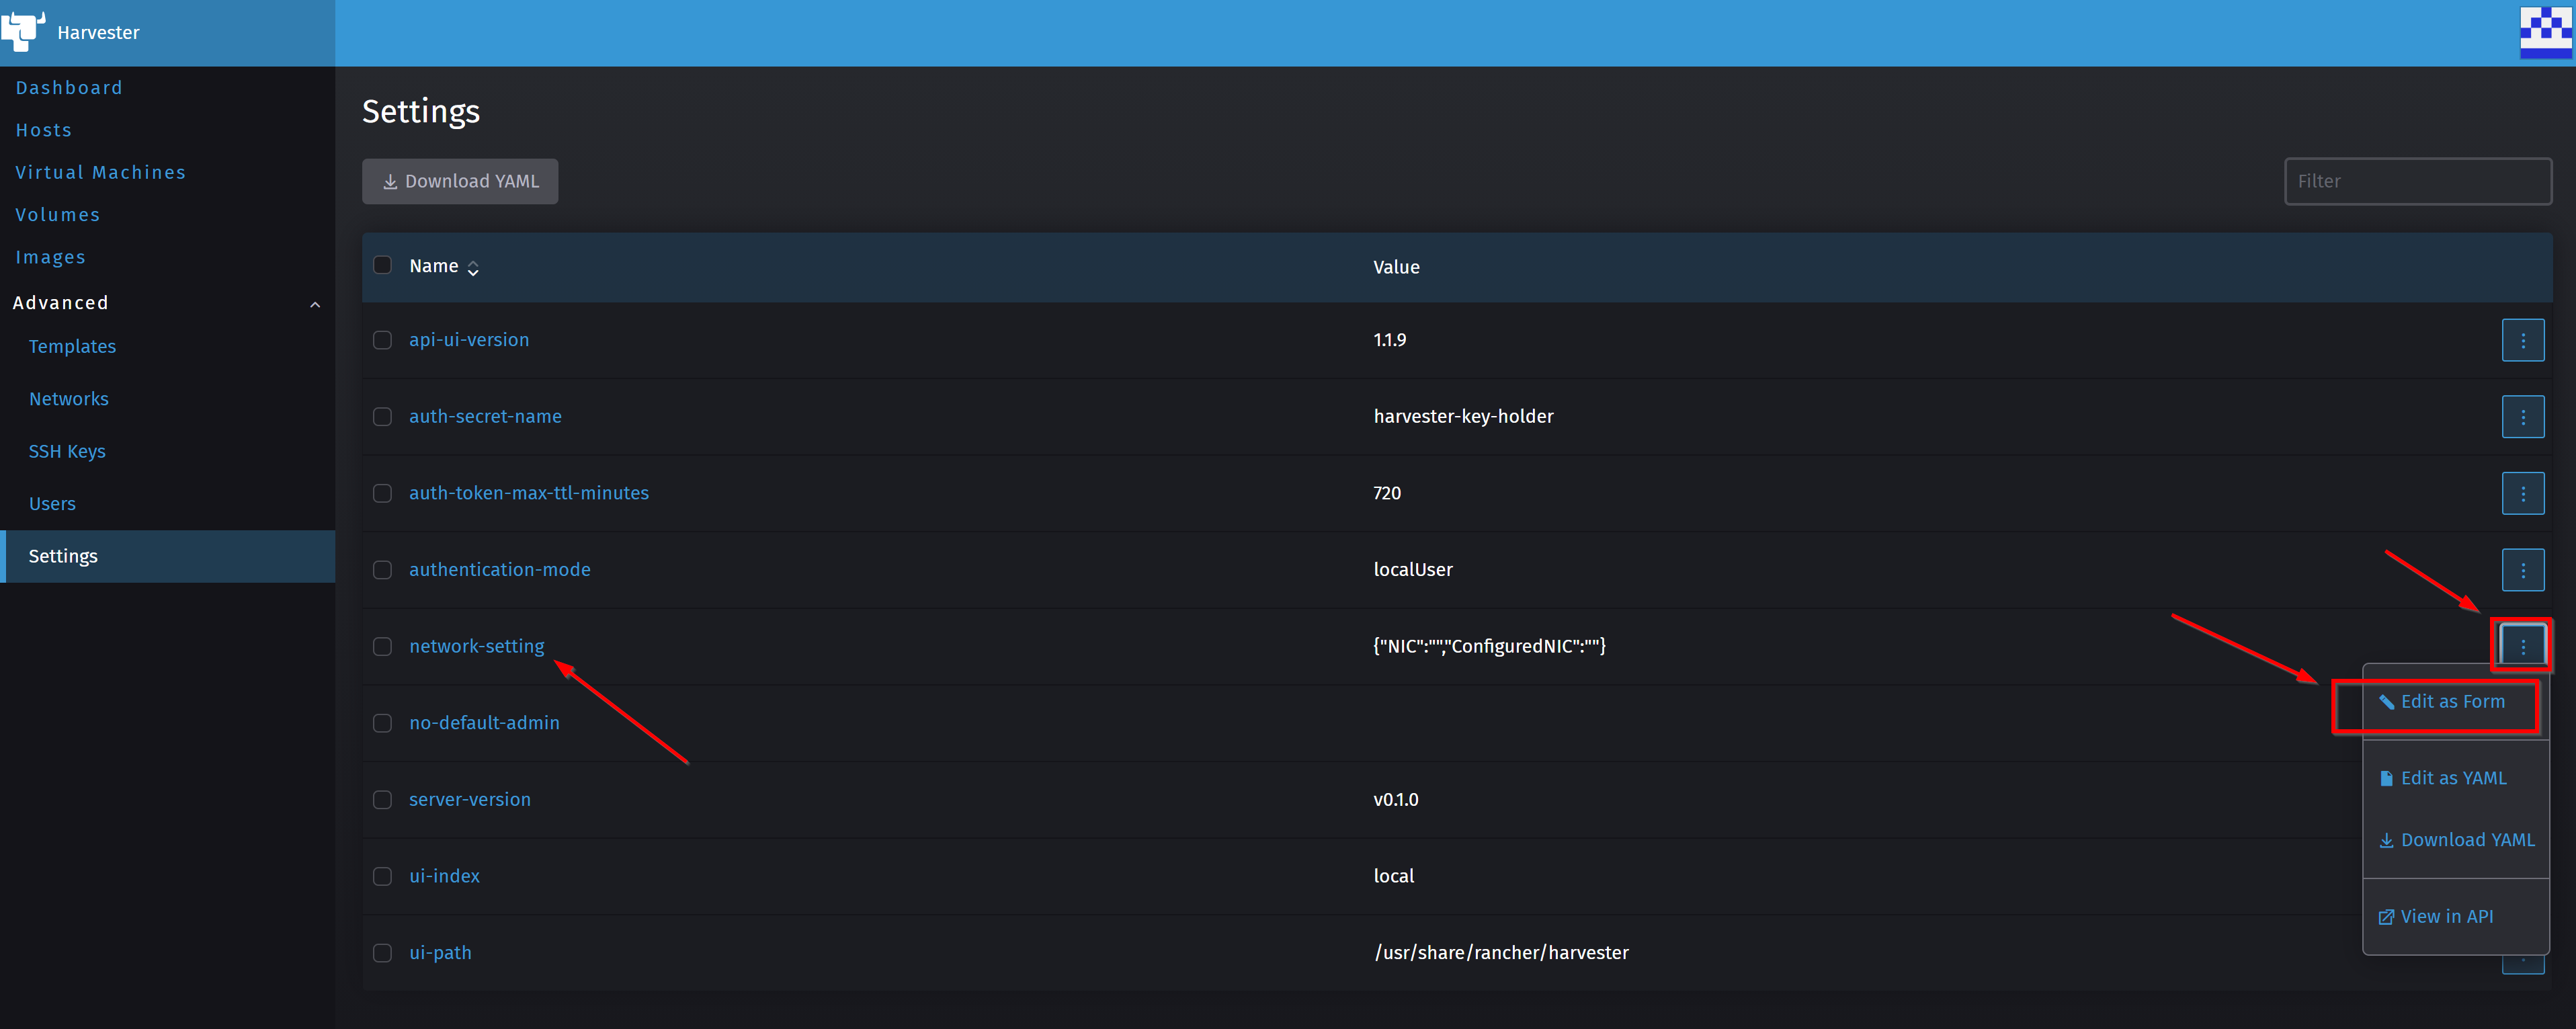
Now, by clicking on ⋮ > Edit as a From in front of network-setting, I can define the network interface that will be used on the Host to bridge the VMs Networking.
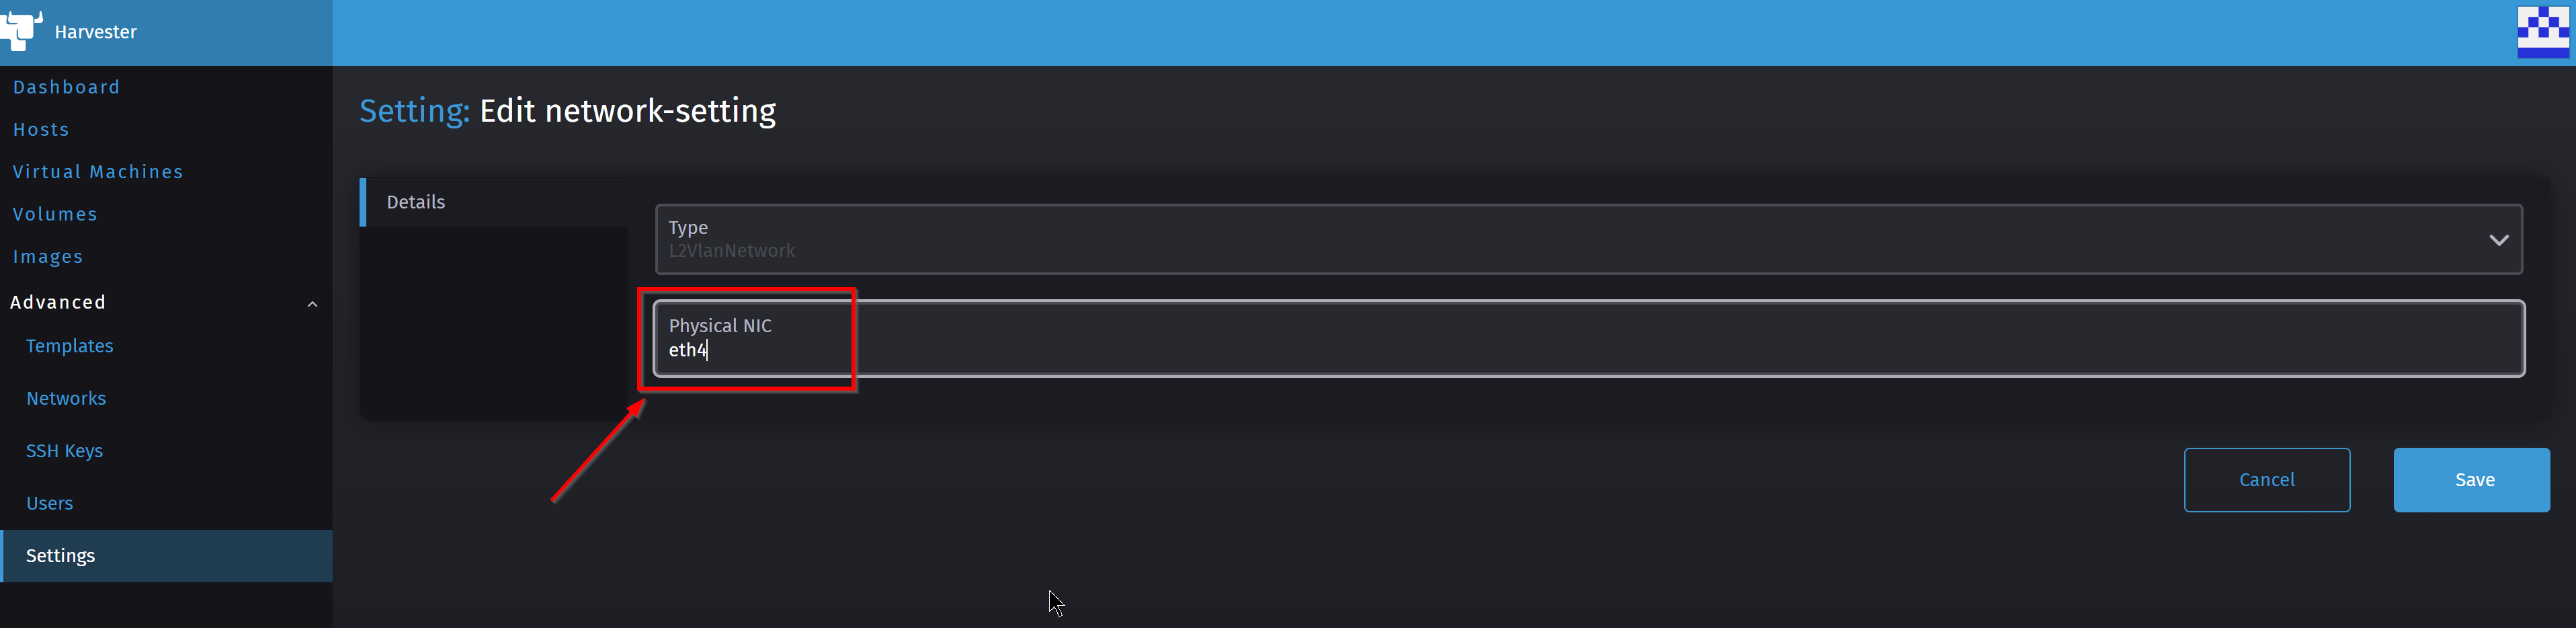
In my case, I will be using the eth4 interface:
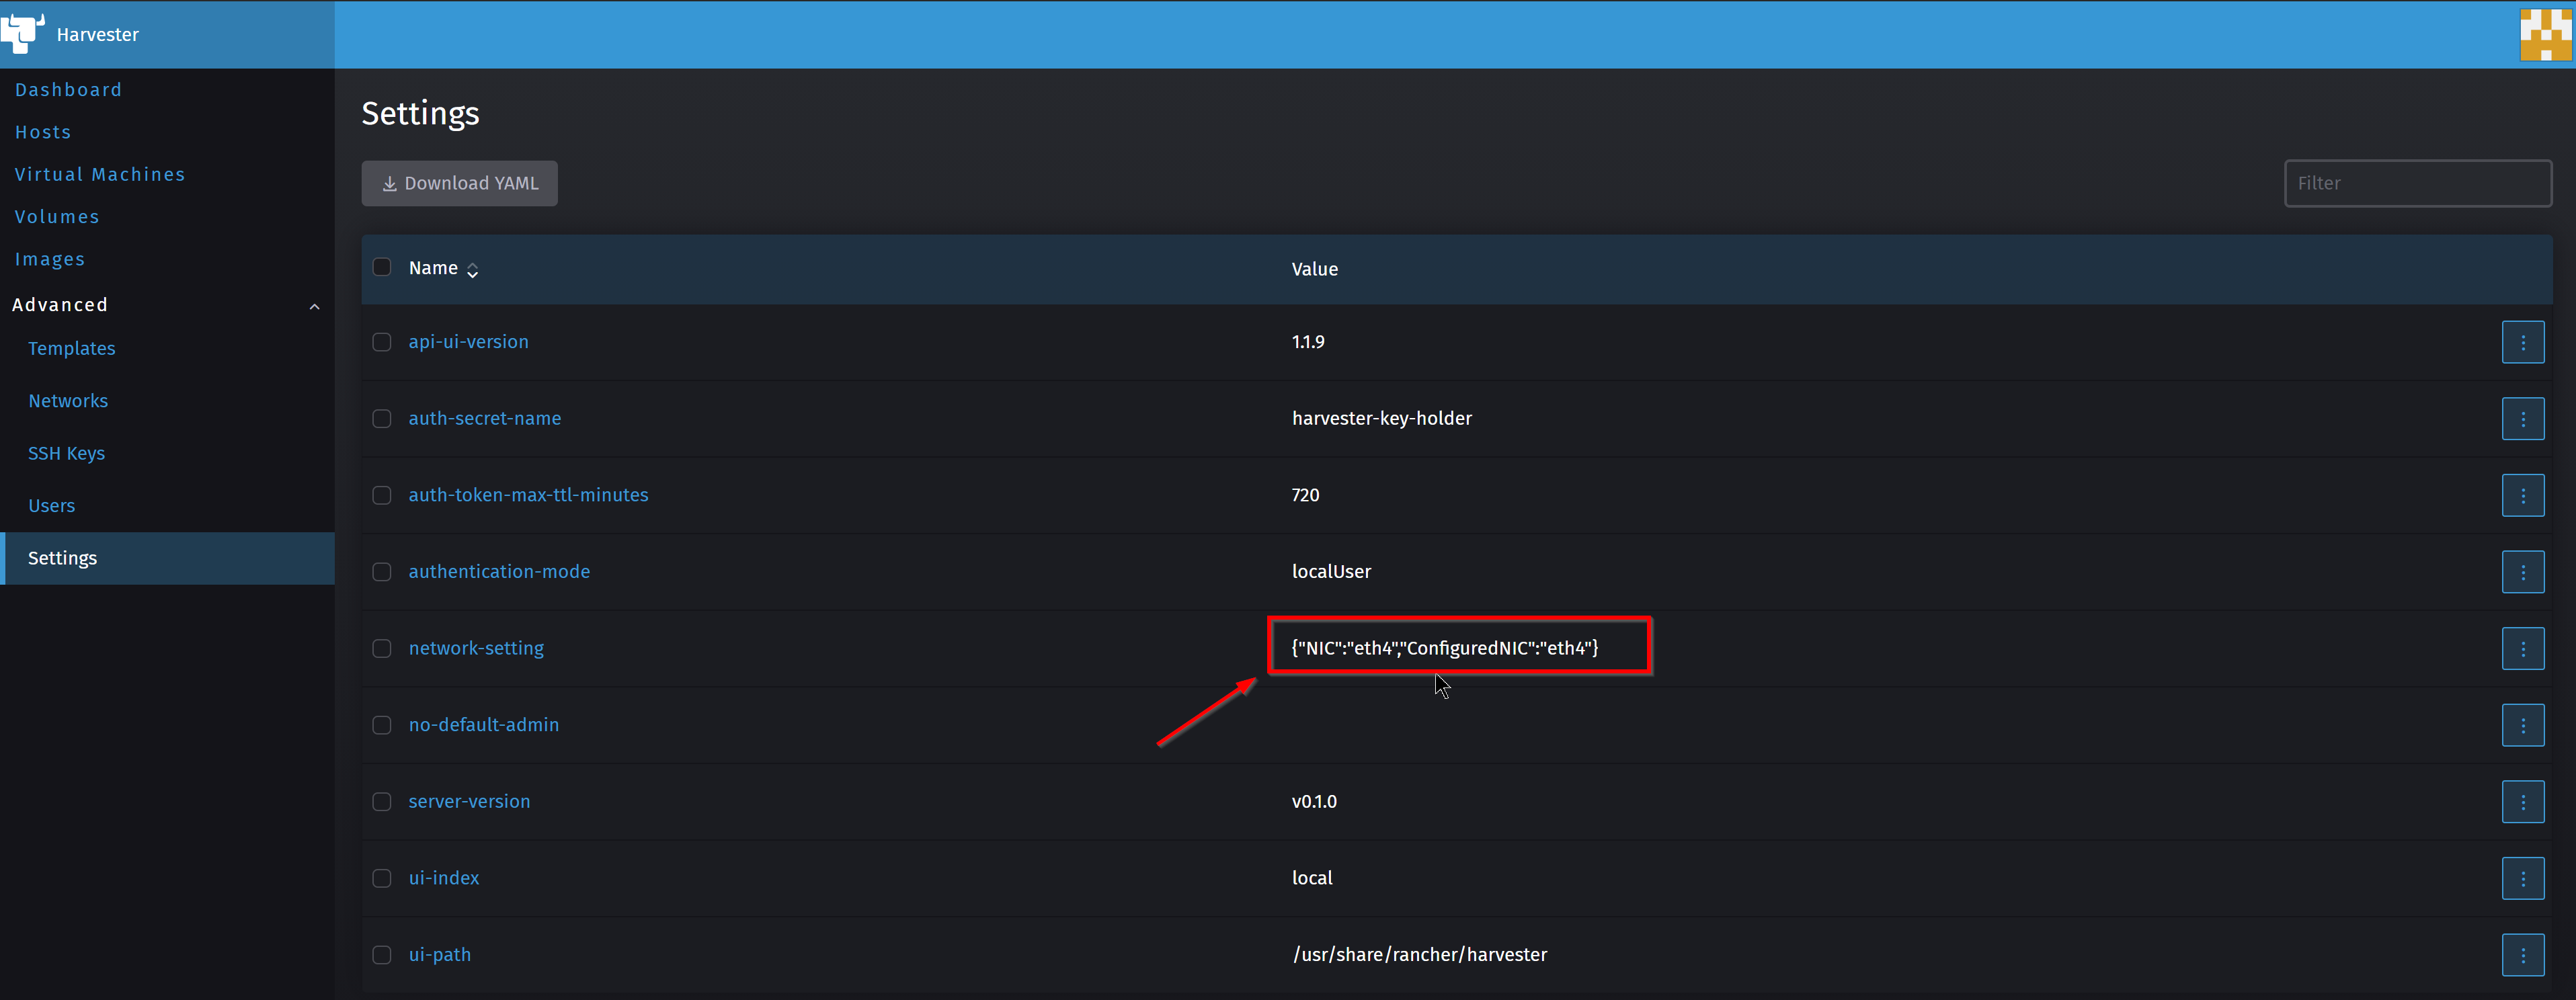
After saving, the following screen shows the new network-setting value:
Now is time to setup the vlan for that bridge network.
Settings up the vlan network
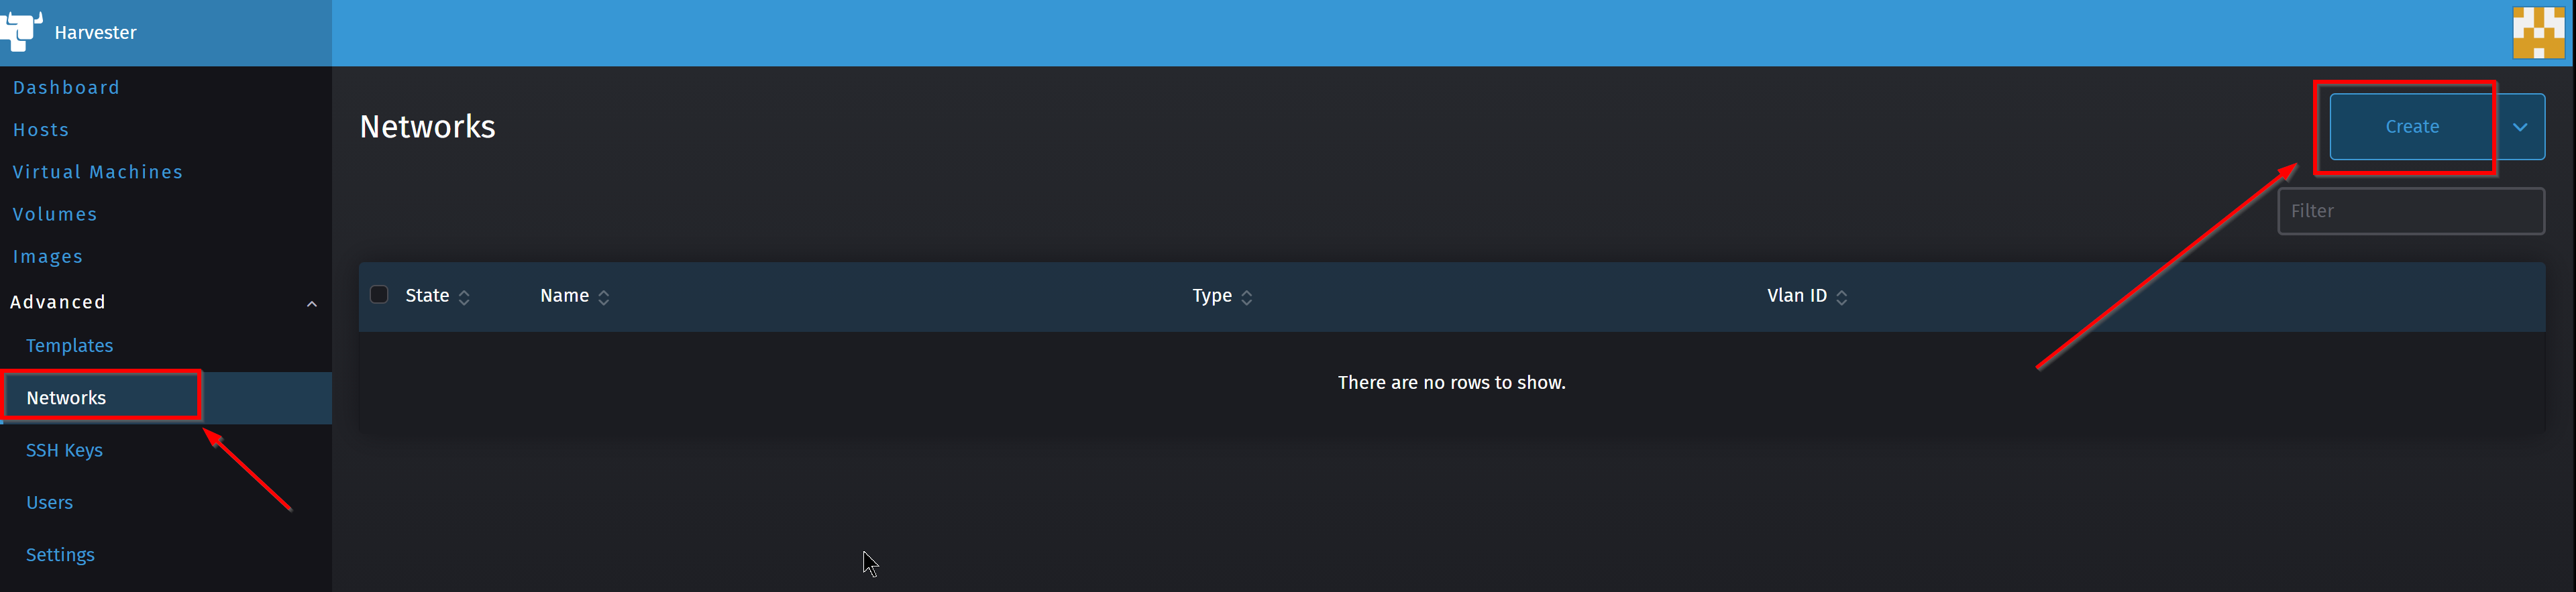
On the menu on the left side, I click on networks to see the following screen where I will create a new network by clicking on the Create button on the upper-right side.
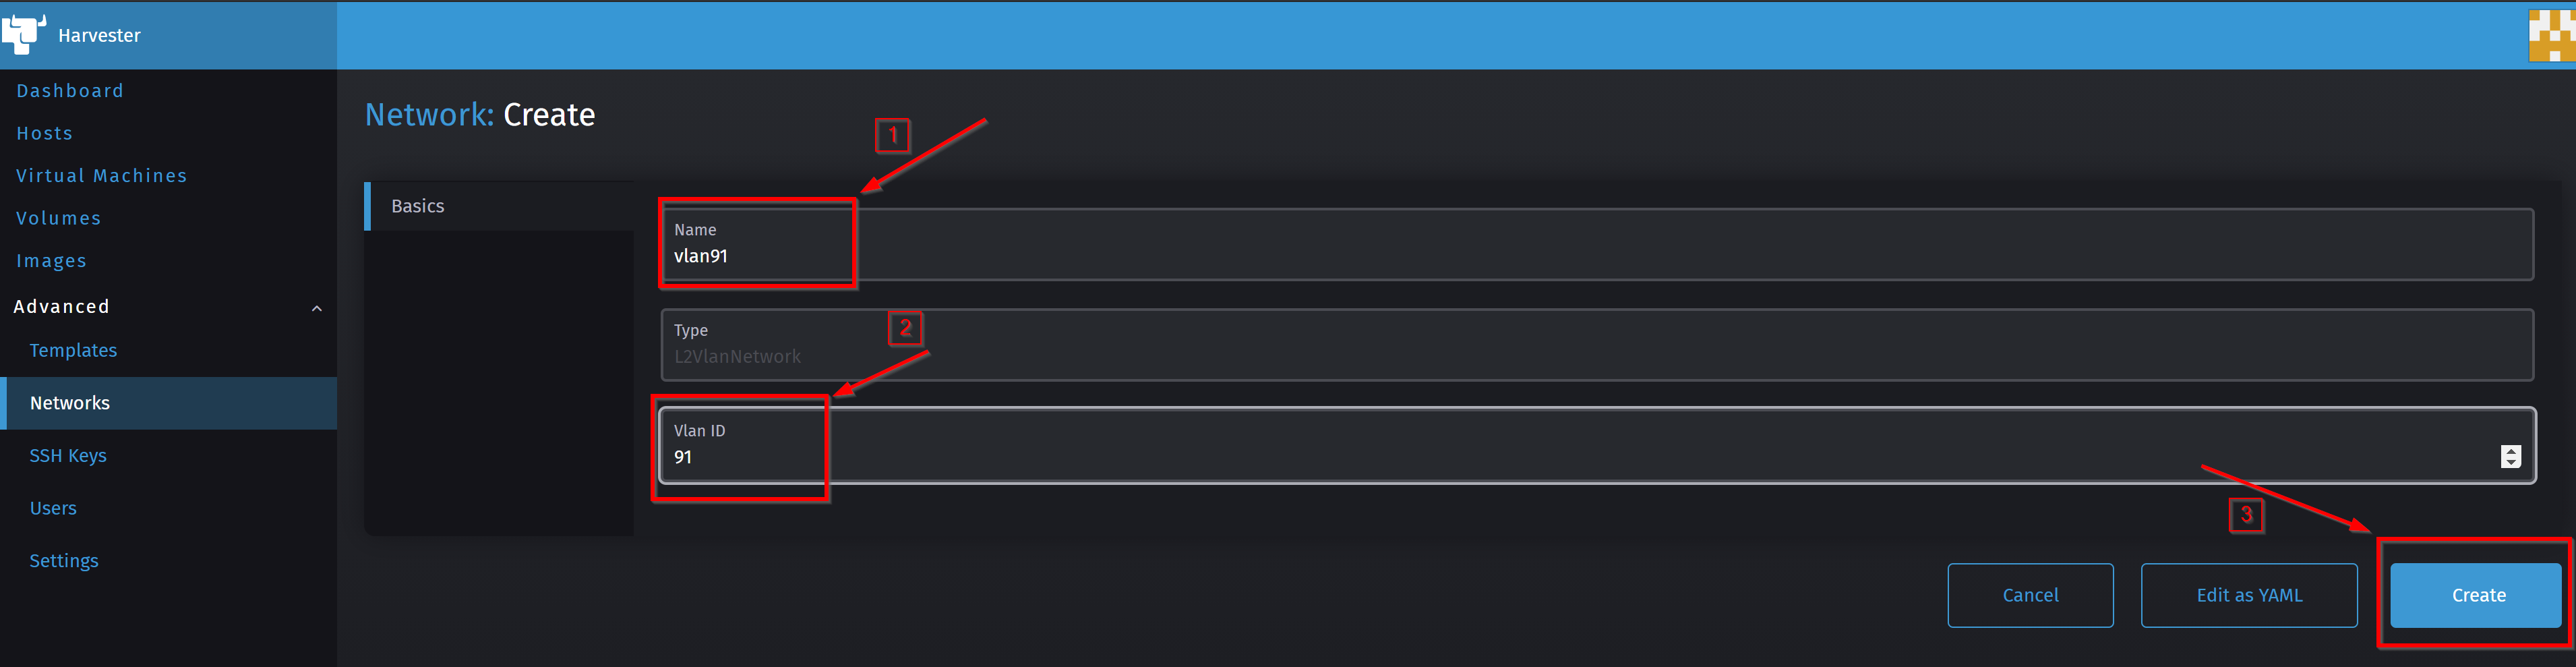
In the next screen, I give my network a name and a vlan number, in my case 91 , then click on Save:
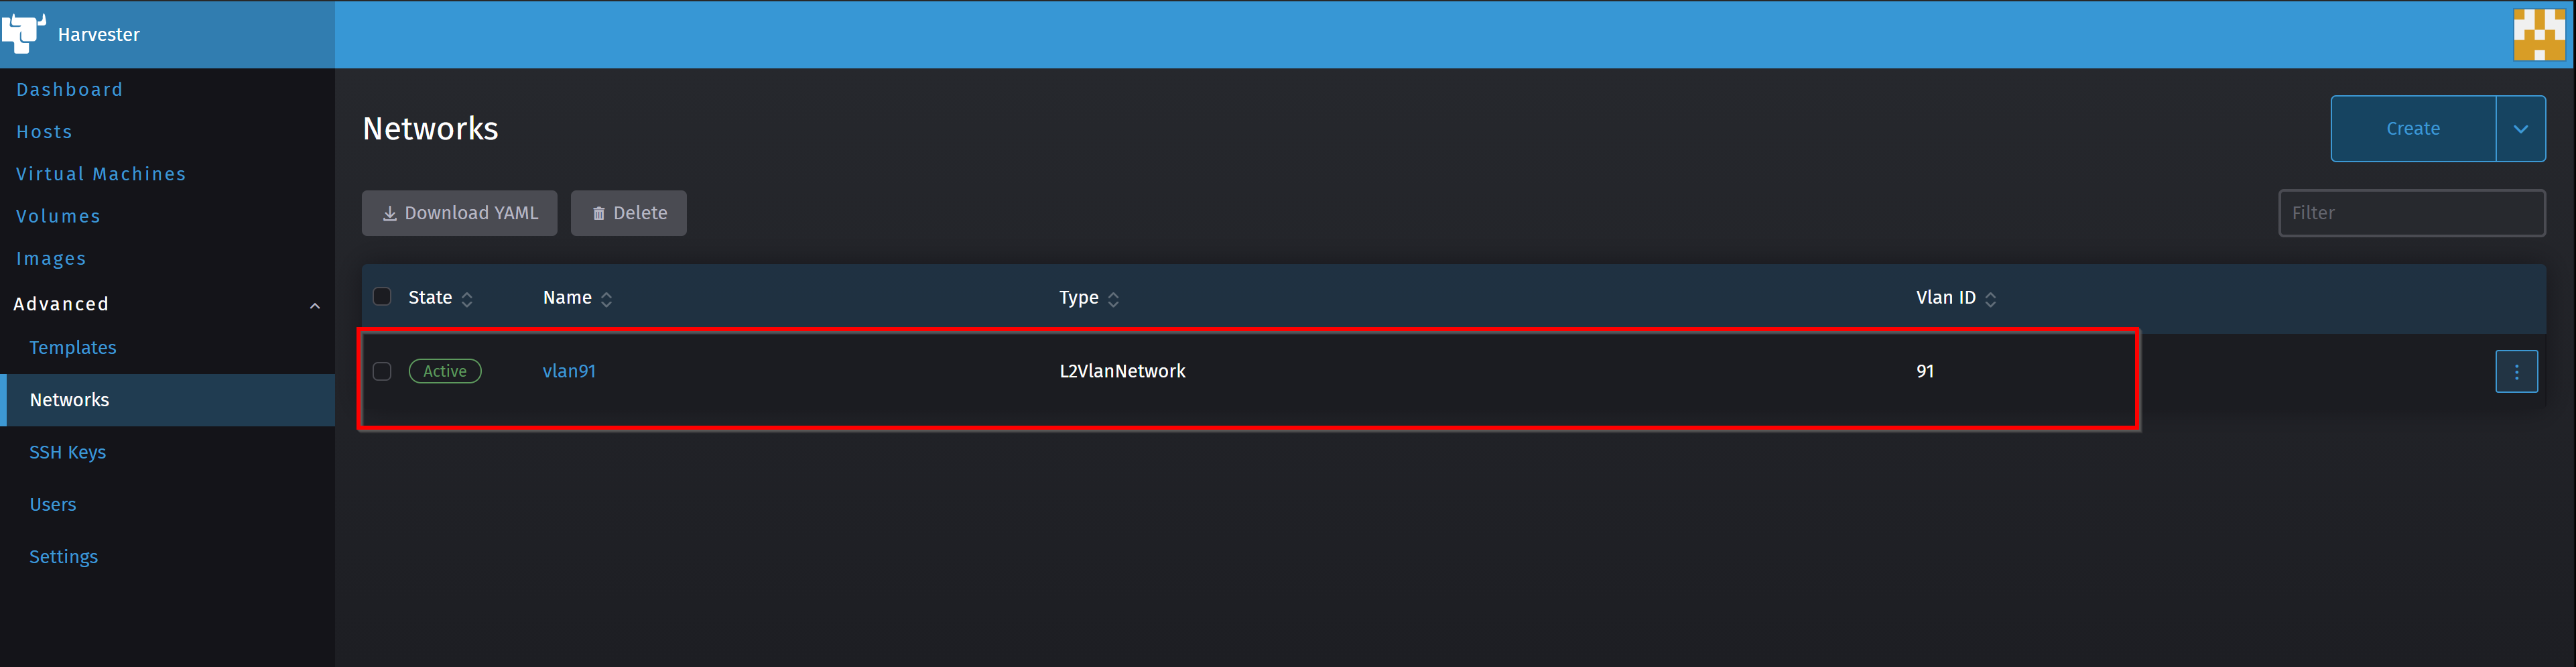
Finally, I check the result :
Now, we are ready to create a VM with bridged networking
Setting up the VM for bridged networking
In order to create a VM with bridged networking, I will do the same process as the one used in the Discovering Harvester article with some slight changes.
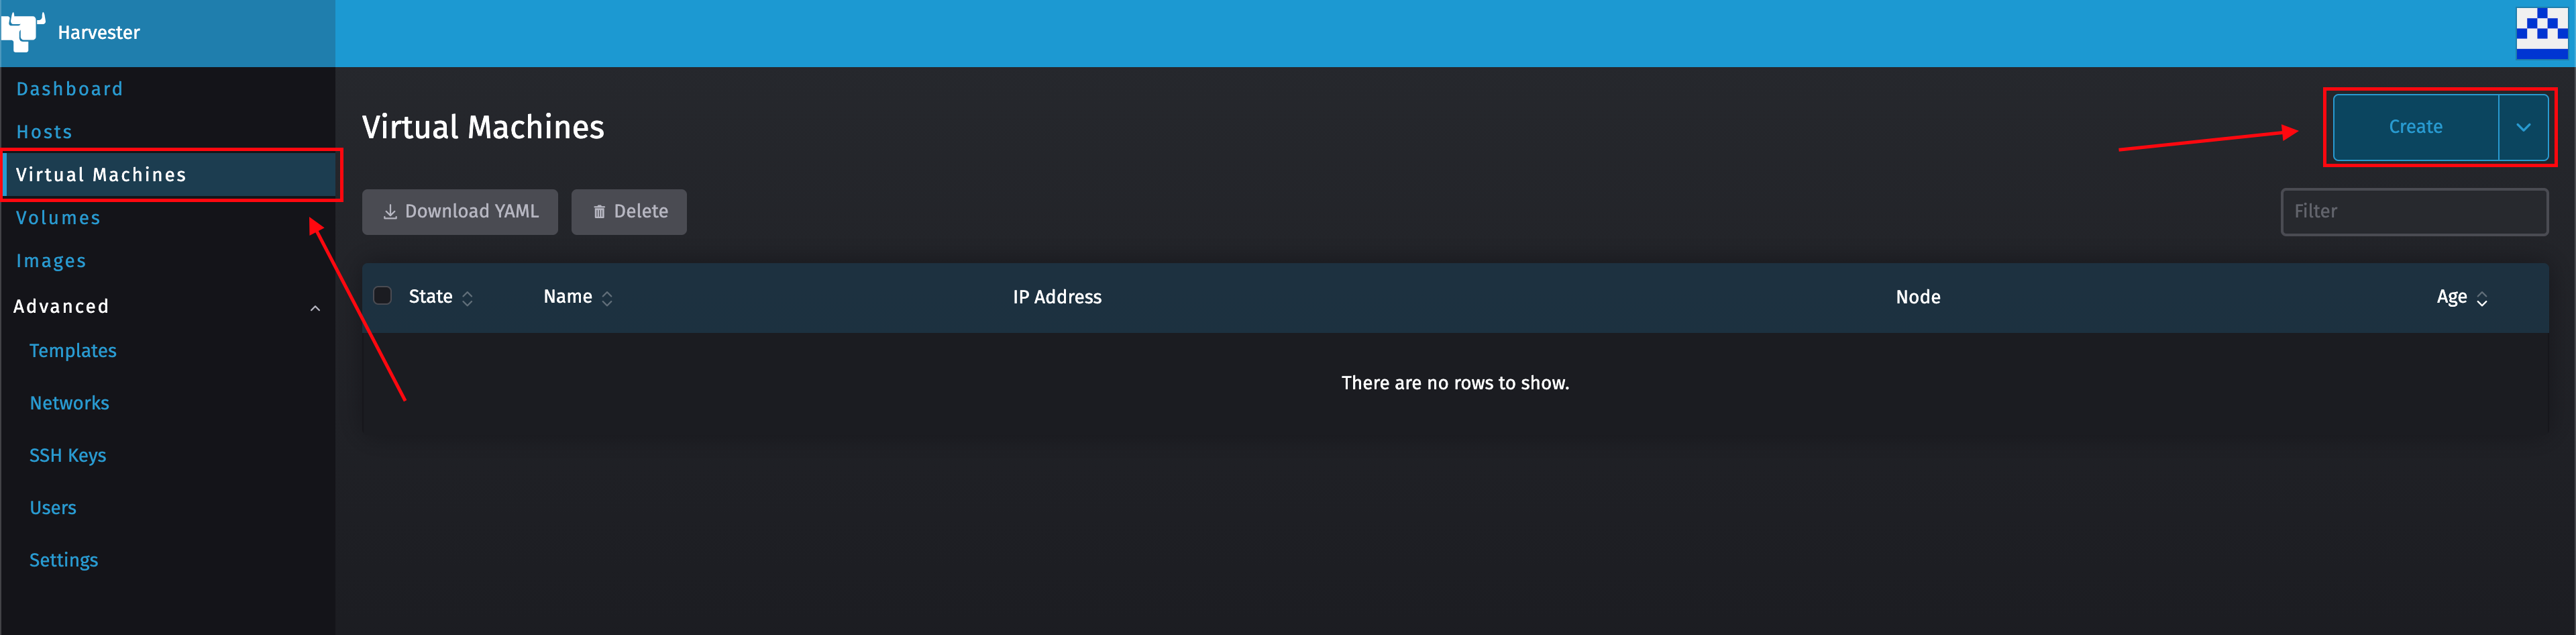
First, I navigate to the Virtual Machines menu item, and then I click on the Create button.
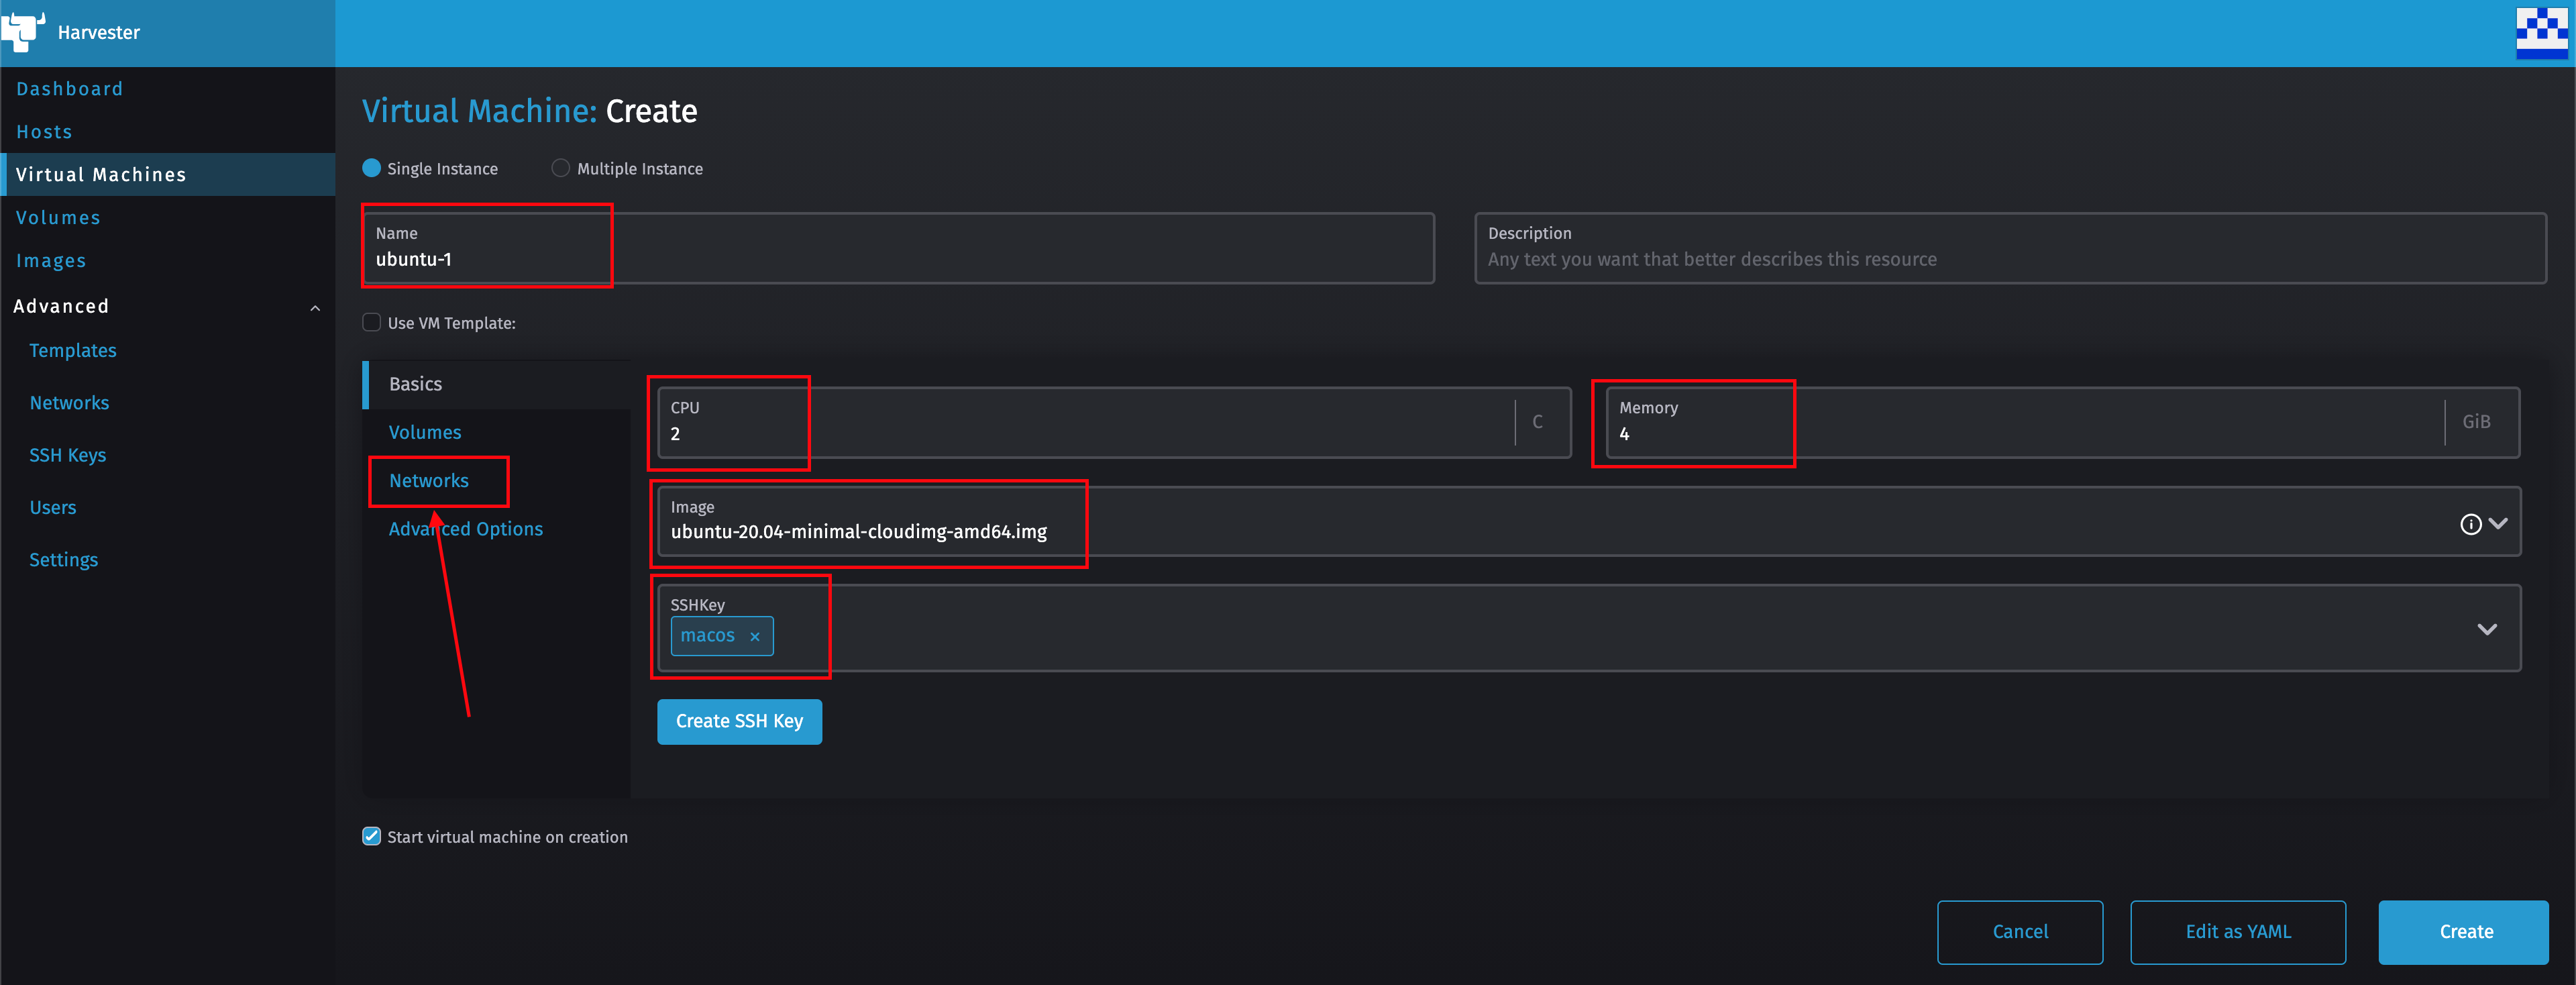
Then, I fill up the basic information for the VM, such as CPU number, Memory Size, Base image and SSH public key as follows:
After that, I click on the Networks sub-menu and click on the Add Network button to find something similar to the following screen:
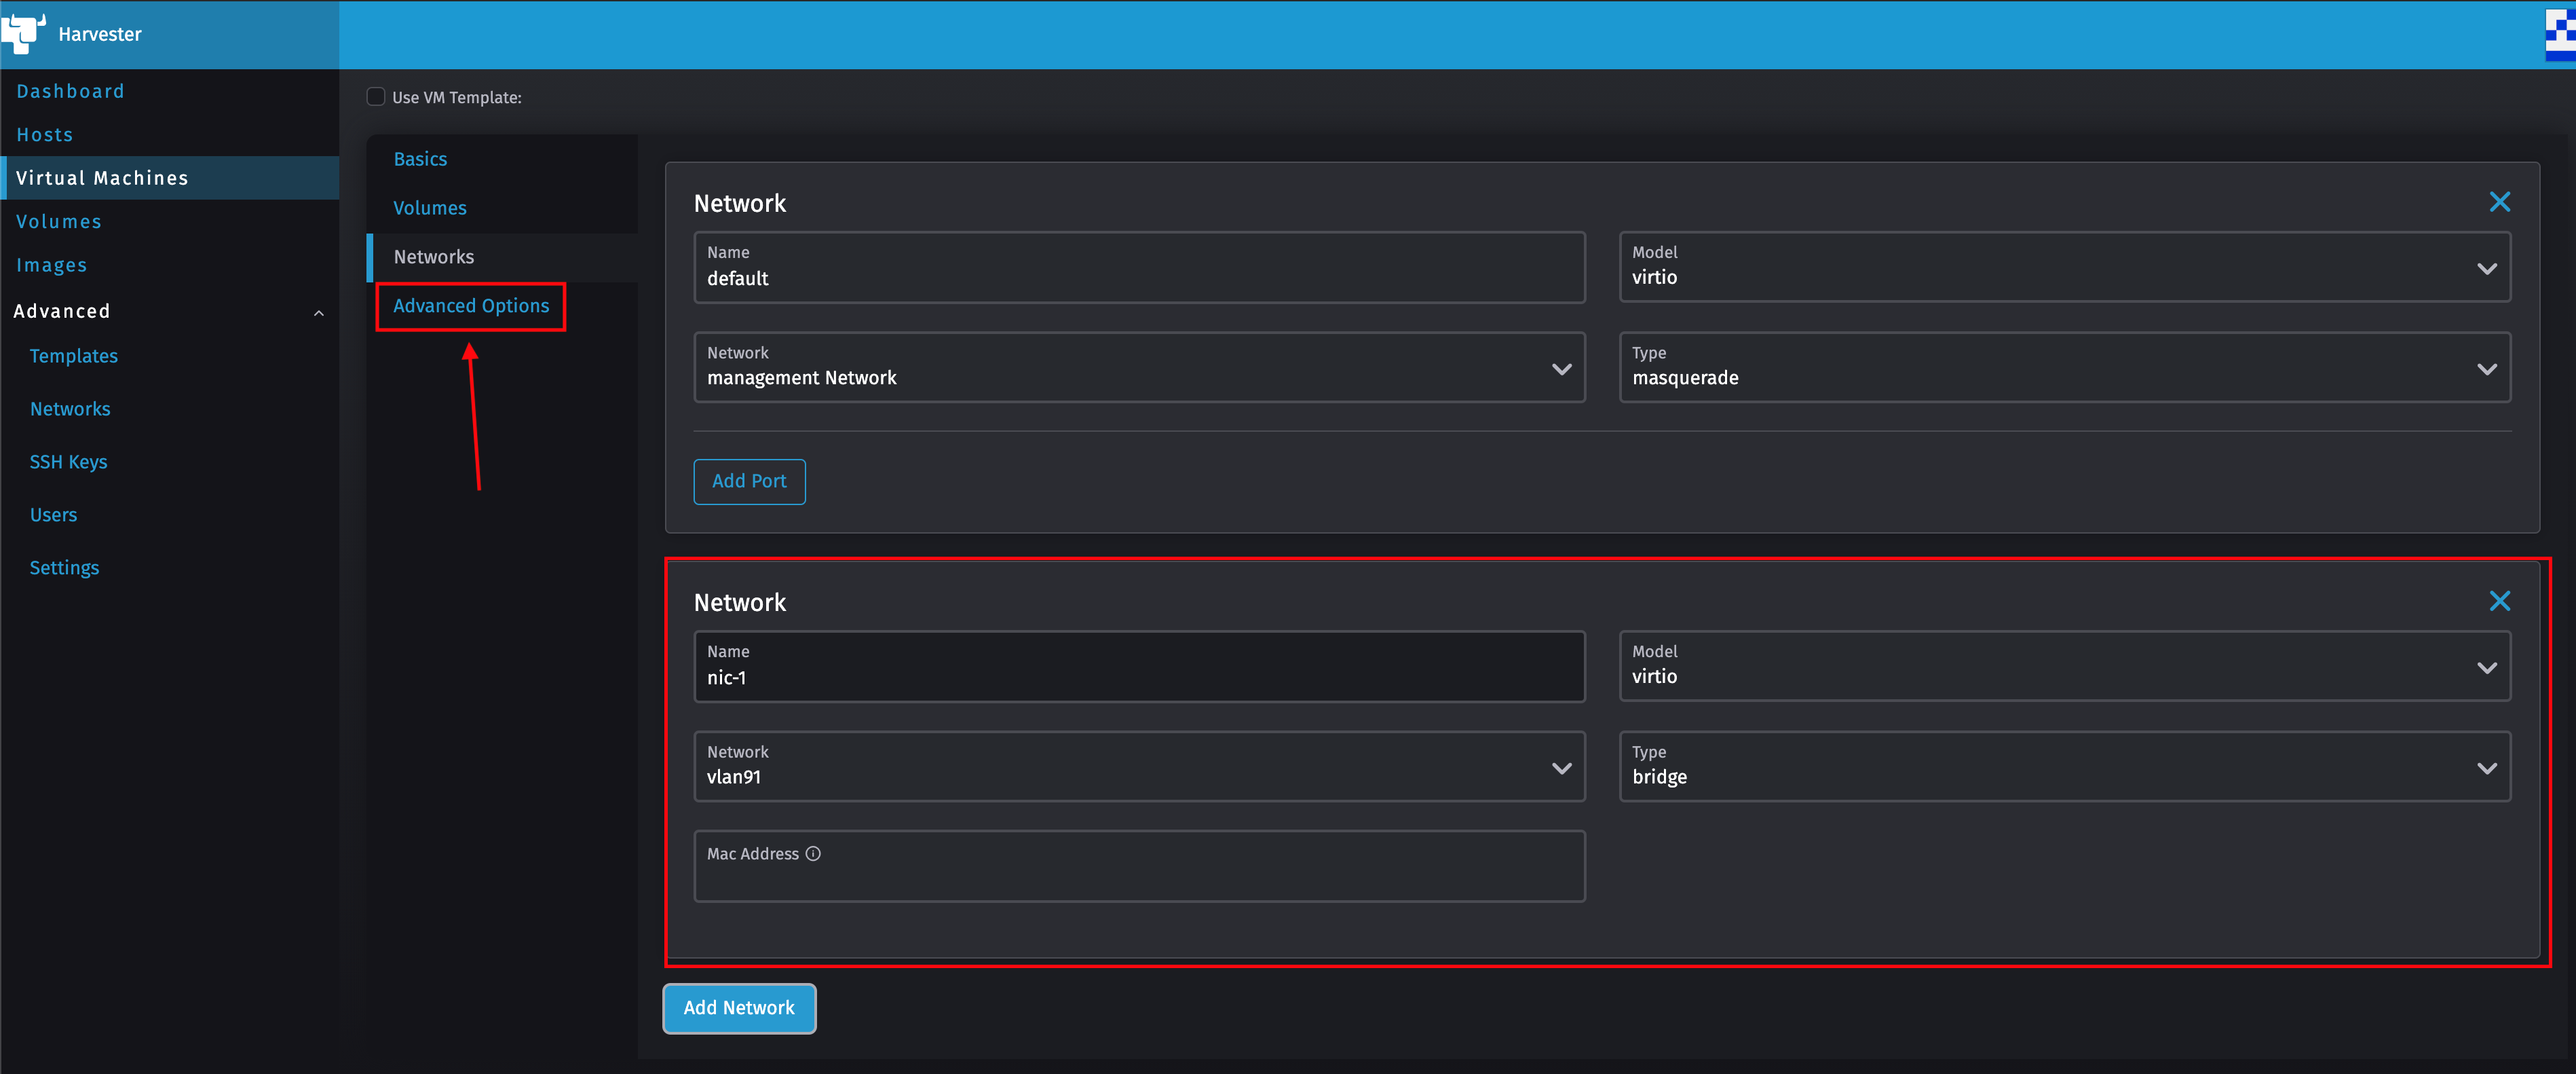
Finally, I click on the Advanced Options sub-menu to do small changes to the User Data and Network Data configurations.
This should be added in the User Data field:
#cloud-config
password: password
chpasswd: { expire: False}
ssh_pwauth: True
packages:
  - qemu-guest-agent
Now, this is not necessary but helps a lot in case something related to networking goes wrong. Keep in mind that in productive environment you might want to remove some of these for security reasons:
- the
passwordfield makes it possible to set a password for the default linux user on the VM, which in my case will be the userubuntu. - the
ssh_pwauthfield set to true activates password authentication in SSH, which might help if your private did not work. - the
chpasswdfield with theexpire: Falsedirective avoids that the password would ever expire - the
packagesfield configures cloud-init to install packages. In our case, the packageqemu-guest-agentwill make it possible to update some fields in Kubernetes (underlying Harvester) showing the IP Address of the VM that was defined using DHCP inside the VM.
And this should be added in the Network Data field:
version: 2
renderer: networkd
ethernets:
  enp1s0:
    dhcp4: true
  enp2s0:
    dhcp4: true
This configuration is a Netplan configuration to activate DHCP for both Network interfaces on the VM.
The final result should look similar to the following:

Now, I just click on Create to finalize the VM creation. After a couple of minutes, the VM should be shown as Running.
Connecting to the VM
As soon as the VM is in the Running state, it is naturally possible to use the Serial Console as it was done in the Discovering Harvester article. In this article however, we will try another way.
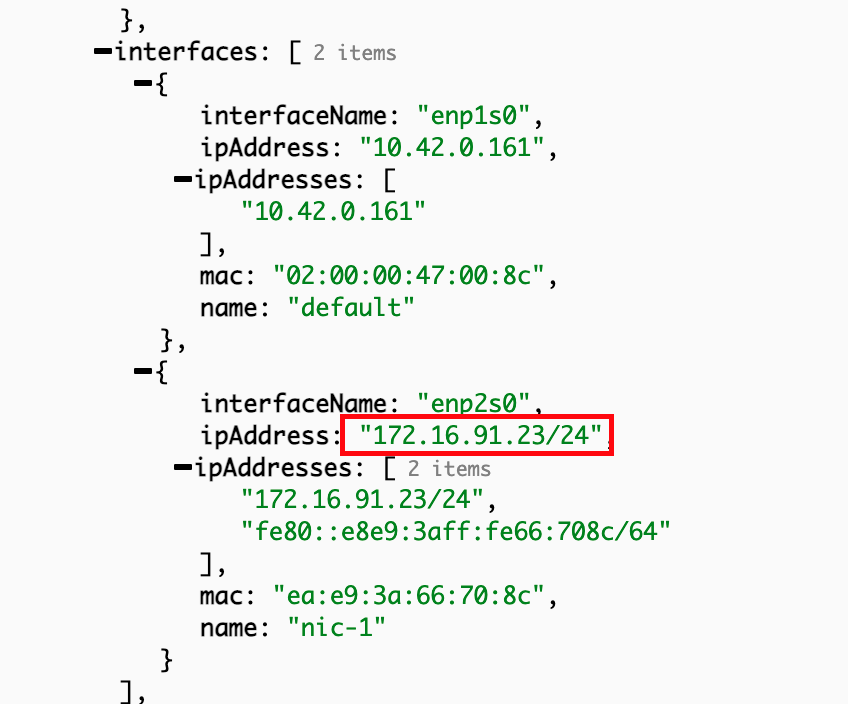
This VM is using a bridged network connection, meaning that it is available on an IP address that should be easily available from outside the Harvester cluster on the VLAN that we defined previously. This IP address is however assigned per DHCP to the VM. In order to get that IP address, it is possible to use the Serial Console first and run the command ip addr show inside the VM, but there is a more elegant solution which will probably be integrated to the Harvester UI in the future. That is through Harvester’s API for VirtualMachineInstances at this address : https://<HARVESTER_URL:HARVESTER_PORT>/v1/kubevirt.io.virtualmachineinstances. Under the interfaces section of the corresponding VM element, it is possible to find the bridged IP address as shown in the following screenshot:
Now, a simple SSH connection to that IP address using the VM Linux user and the corresponding private key should get you a prompt:
harvester-7m6kh [~]$ ssh ubuntu@172.16.91.23
load pubkey "/home/rancher/.ssh/id_rsa": invalid format
The authenticity of host '172.16.91.23 (172.16.91.23)' can\'t be established.
ECDSA key fingerprint is SHA256:PFBj8bqpUmnkX5gwVNFgWh4dLWGyhWWbEMXGwMPTKrs.
Are you sure you want to continue connecting (yes/no/[fingerprint])? yes
Warning: Permanently added '172.16.91.23' (ECDSA) to the list of known hosts.
Welcome to Ubuntu 20.04.2 LTS (GNU/Linux 5.4.0-1036-kvm x86_64)

 * Documentation:  https://help.ubuntu.com
 * Management:     https://landscape.canonical.com
 * Support:        https://ubuntu.com/advantage

This system has been minimized by removing packages and content that are
not required on a system that users do not log into.

To restore this content, you can run the 'unminimize' command.

0 updates can be installed immediately.
0 of these updates are security updates.


The programs included with the Ubuntu system are free software;
the exact distribution terms for each program are described in the
individual files in /usr/share/doc/*/copyright.

Ubuntu comes with ABSOLUTELY NO WARRANTY, to the extent permitted by
applicable law.

To run a command as administrator (user "root"), use "sudo <command>".
See "man sudo_root" for details.

ubuntu@ubuntu-1:~$
Conclusion
In this article, using Harvester, we defined a Host Network Interface to be used for VM Network bridging, then we associated a VLAN and made a new VM join that VLAN and use DHCP to get an IP Address. Then, we used Harvester’s API to get the IP address of the VM on the bridge network and connected successfully to the VM using SSH. This process will be greatly improved and simplified in the future. But, at least until then, you can also do it relatively easily using this method.
Does this method also work for you? Did you have issues? Please let me know in the comments below and I will be more than happy to engage with you.